

Ceilings are often overlooked, but they play a key role in both the structural integrity and aesthetic appeal of a home. Cracks and leaks can compromise the integrity of your home, but identifying the source of the problem and taking immediate action can minimize damage.
The first step in successful Ceilings Perth repair is to dry the affected areas to prevent mold and mildew. Then, prepare the surface by cleaning and sanding to ensure the patching compound adheres.
 Identifying The Source Of The Leak
When a water spot appears on your ceiling after heavy rain, it’s often more than just a cosmetic issue. It’s a warning sign that there is a leak in the roof and water is leaking into the home. If left unattended, a leaky ceiling can cause significant structural damage and foster mold growth.
Fortunately, the problem is often much easier to repair than you might think. However, the first step is identifying the source of the leak and tracing it to its origin. Here are some helpful tips to help you do just that.
The most obvious place to start is with a visual inspection of the area around the leaking spot. Look for stains, mold, and other signs of water intrusion. If possible, look for the water source itself by following the trail of moisture. Usually, water will pool in an area and then travel downward, though this may take a circuitous route. Use a bucket to catch the water or spread plastic over the floor below the affected area. This will prevent the water from accumulating and keep it from collapsing the ceiling.
Another important step is reviewing outside sources for information that could have contributed to the problem. This may include checking local weather records and examining the condition of your roof and eaves. If you can’t identify the source, or if the water is extensive, it’s a good idea to call in a professional.
If you have access to a ladder, carefully set it up near the area of the affected ceiling. Remove any light fixtures or other decorations from the area so you can work safely. If you have large pieces of furniture in the room, cover them with a plastic tarp or drop cloth to prevent damage. If you are not confident you can safely reach the damaged area, ask a friend or family member to spot you from the ground below.
Once you’ve identified the area of the leak, start at the point closest to the flooring. Water tends to pool at the lowest point, so a drip in the ceiling will likely lead to water on the floor below. From there, you can trace the path of the water, determining whether it is running continuously or only after rain, and determining if condensation is a factor.
Inspecting For Structural Issues
When performing ceiling repair, it’s important to assess the structural integrity of the drywall. If you notice sagging or cracking, this could be a sign of significant water damage and requires immediate attention. Sagging can cause a ceiling to collapse, creating serious safety hazards for occupants and other structures in the building.
A professional inspection will reveal the extent of the water damage and determine if any other areas require repair. It’s also important to look for signs of mold growth, which can pose health concerns for occupants. Water damage can also lead to electrical problems, including arcing and short circuits. Regular maintenance and prompt repairs can prevent these hazards from occurring.
Structural issues can be difficult to detect without a professional inspection, but they can be very dangerous if left untreated. A sagging ceiling is a clear sign of water damage, but it may also indicate other problems. For example, a sagging ceiling could be caused by failing drywall tape or rotted joists. In these cases, the inspector will recommend repairing or replacing the affected area of the ceiling.
Home inspectors will also inspect the attic for rotted wood and damaged drywall. They’ll also look for any signs of joists that have been cut into or weakened by homeowners or remodelers. For example, a homeowner or remodeler may cut into a wooden floor joist to access plumbing, but this can compromise the structural stability of the house.
When you’re performing a ceiling repair, it’s important to follow proper ladder safety to avoid injury. Remove any light fixtures or ceiling fans to prevent damage to these items, and set the ladder on a stable surface. Also, have someone spot you to help ensure your safety when climbing the ladder.
A leaky ceiling can lead to unsightly water stains, mold growth, and ceiling collapse. Regular maintenance, timely repairs, and preventative measures can minimize these risks and extend the life of your home or commercial property. Using the right tools and techniques, you can easily restore your ceiling to its original beauty and functionality.
Repairing Cracks And Water Stains
When water damage damages a ceiling, it not only creates unsightly stains and weakens the structure, but it also can foster mold growth, which poses health risks and further compromises the integrity of the room. Regular maintenance of walls and ceilings is vital to prevent these problems. But if the problem is serious enough, you may need to undertake some major repairs.
One of the most common signs of a water leak is cracks in the ceiling. Often, these cracks are accompanied by a dripping sound that may indicate a broken pipe or a structural issue. It’s important to locate and repair the source of the leak as soon as possible to prevent further damage and potential health issues.
A cracked ceiling should first be cleaned thoroughly. Use a mild homemade bleach solvent (one cup of bleach mixed with three cups of warm water) to remove any lingering mildew, dirt, or grease that can prevent primer and paint from adhering to the ceiling surface. If the ceiling is textured, you’ll need to smooth out the texture with a joint compound or drywall patch. Once the patch or compound is dry, sand and then roll on a coat of primer before painting the area.
Besides cracks, ceilings can become stained from condensation or other causes of moisture. This is often the case in older homes with inadequate ventilation or improper insulation. Ensure proper insulation and ventilation, and consider replacing old caulking to prevent water leaks.
If you have a wood or plaster ceiling, it’s more difficult to repair a water stain than on drywall. Depending on the extent of the damage, you might need to strip the ceiling back to plaster and then repaint it, or you might be able to replace the damaged section with a patch made from drywall. Once again, be sure to identify and repair the source of the water leak and check for rotten areas in the wood.
It’s essential to do a monthly inspection of the ceiling to look for any new stains. This will help you catch the problem early, and it’s less likely to require extensive ceiling repairs.
Restoring A Water-Damaged Ceiling
The first step to repairing water damage on the ceiling is fixing the source of the problem. That may involve a roof repair, replacing shingles, or a pipe fix. Once that is done, it’s time to start addressing the ceiling damage itself.
Before starting any repairs, make sure that the area is completely dry. This will prevent mold and mildew growth, which can also cause further damage to the ceiling. If possible, open the windows to help speed up this process. It’s also a good idea to use a moisture meter to verify that the areas of the ceiling that are affected are fully dry.
If the damage is severe, it’s best to hire a professional. That way, you can be sure that the repair is done to the recommended safety standards. Extensive water damage is likely to require significant structural repairs and could even require removing and replacing parts of the ceiling itself.
For minor discoloration on the ceiling, it’s often enough to just clean and repaint the affected area. However, you should always use an oil-based primer to avoid marks showing through. You should also use stain-blocking paint to prevent any water-based stains from coming back in the future.
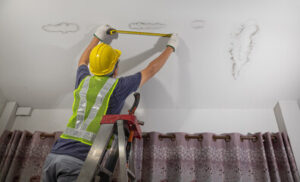
More serious discolorations on the ceiling may need to be treated with a solution that removes mildew and mold, before being repainted. For larger stains, it’s usually necessary to cut out the affected section of the ceiling and replace it. This requires careful measurement to ensure that the new section is a proper fit.
Once the damage to your ceiling has been repaired, it’s a good idea to repaint the entire room. This will not only make it look fresh and clean, but it can also improve the acoustics of the space. It is important to use high-quality paint, as this will help to ensure that the paint lasts for as long as possible. This will also make the room more pleasant to live in and can increase the resale value of your home. If you have any questions about a water-damaged ceiling or would like to see how we can help you repair it, please don’t hesitate to contact us.